
To continue the previous article, let's short review what advantages of our wire drawing die measurement system have been introduced:
1. Performance:
Imaging technology: The advanced imaging technique we are using, display drawing die bore edge in circular ring, which can be obviously distinguished with other systems that displayed a round shape.
Dust Tolerant: Even dust on objectives surface, our system still can get accuracy measurement.
Use DOF (depth of focus) objectives, which allow the system perform faster than others.
2. Hardware:
Exclusive Anti-disassemble housing design;
Oil sealed turntable, no need to add lubrication;
The best positioning gear;
Automatic calibrate light source;
Reliable performance in temperature change;
In part II, today we are going to start from maintenance, which should be another essential concern of whoever purchase a hardware.
You should aware a maintenance fee will be charged every year from the date of the drawing die measurement instrument you purchased. Is it costly or cheap, which is a critical question, the answer may vary. Anyway, it costs thousands of US dollars every year, to make sure the property of yours working as expected.
If we look back to the date of first drawing die measurement instrument launched, it is decades ago. And till the date, the hardware architecture looks same, even hardware engineering industry has been developed quite a lot. As long as the instruments work, and no alternative products in the market, then nothing need to do, I assume.
When we started designing and developing such a product, we were not only just intending to copy a product which existing in the market already, but also intend to improve it with latest technologies.
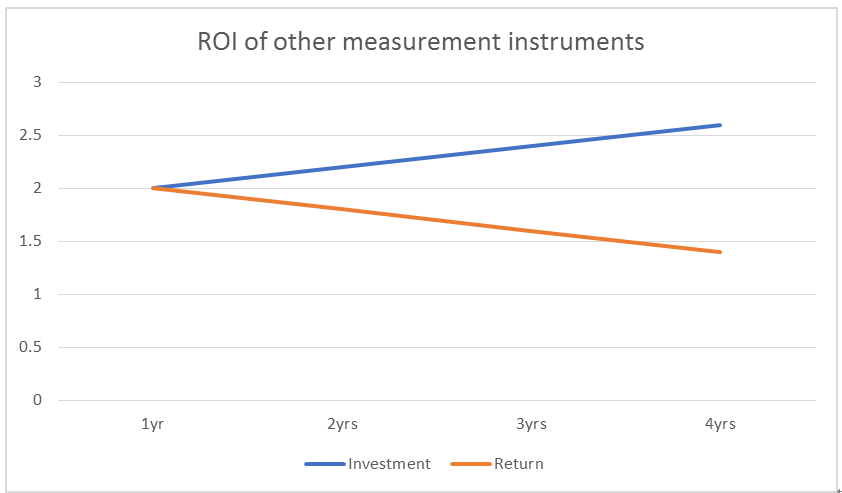
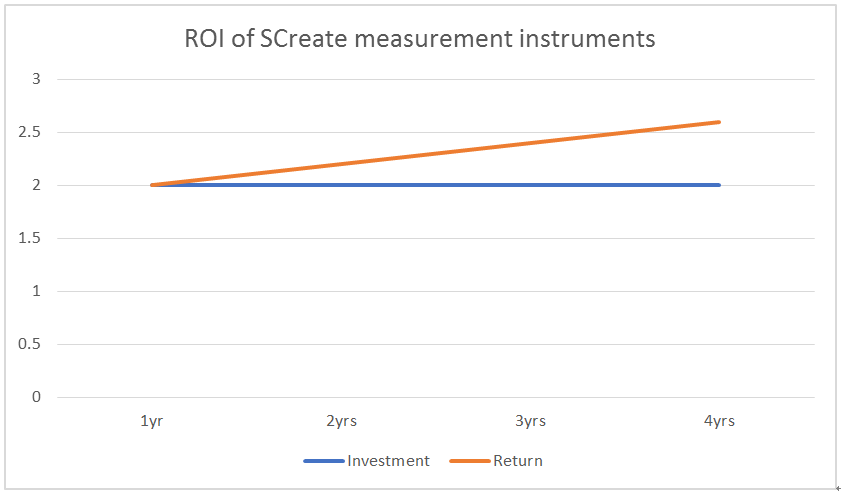
In part I, the hardware has been introduced, those designs with up-to-date architecture designs, allow the instruments no more needed to add lubrication, ensured the position gear reliable working in lifetime, and no worries about replace light source. Thanks to technology development, we can confidently offer the instruments an unmatchable feature: maintenance free. Four years till now since the very first batch of instruments sold to customers, we are keep surveying the satisfaction and feedback from users randomly every year, none of a case that require any hardware maintenance or RMA claim by far. If you have other instrument 4 years, you have paid more than USD 10K+ for the maintenance, and how would you rate it after years of using?


How about the calibration?
We are confident the factory standard setting provides very accurate measurements, yet we also offer direct remote calibration service if there is internet access at your side. Even you are on the wait list, you will not wait for more than 2 business days to have the calibration done.
Software
You don’t have to order any dedicated PC with hard coded measurement software from us, a USB 3.0 flash included measurement software installation file is packed with our instrument, and it can be used to install our measurement software on any Window OS computer. This desktop software is just an I/O window, data is storage in our instrument, not on PC. Window OS may fail, or PC hardware may down, no matter what happen, just connect measurement instrument to another PC and install the software on it, you have the same software ready to use as it was.
Other excellent features:
Dust isolation cover
Even we are using DOF objectives with our drawing die measurement instrument, it has outstanding dust tolerance, but it is nice and a plus to cover the optical measurement part when we are not using it.
So we designed this:
The dust isolate cover can be lifted (open) by press the button, when you are ready to use it.
But you have to press and hold the button when you want to close the cover, as it is closing bit of slowly, it is designed for avoiding the cover to clip hand or material.
To operate the instrument, is any training or skill background required?
Rest assured, only one-time mouse click is all required per measurement.
If your staffs have experience with measuring on other brand of instruments, they will find no difference when operate on our systems.
To inspect diameter of finished dies, try ‘real-time mode’ on DM100, it offers the highest productivity. Put the die and read the diameter, cannot be faster.
Ok, this is the part II, off the record, a frequently asked question is: How much does it cost?
According to the performance, the latest architecture design, the money saving feature of maintenance free, we still have lot of positive points to name it, it should cost decently. Well, yes and no. I'd rather prefer to say it cost reasonably.
Want to have a working machine nearby your location to watch and evaluate? We are working with professional agents, contact us to find a nearest agent now.